How to Support Spelling - Scoop Spelling Strategy
One of the most common questions we get is how to help students with their spelling. This makes sense because…
Spelling is hard!
Students need to make multiple connections to spell effectively. They need to:
Hear/interpret the word correctly
Identify all the individual sounds
Pair each of those sounds with the appropriate letter or letter group
Consider any applicable rules
How can we support students in this process?
We like to use graphic organizers and step-by-step instructions for students whenever possible. In this case, we use a 4-step process that we call “Scoop Spelling.”
How to Scoop Spell
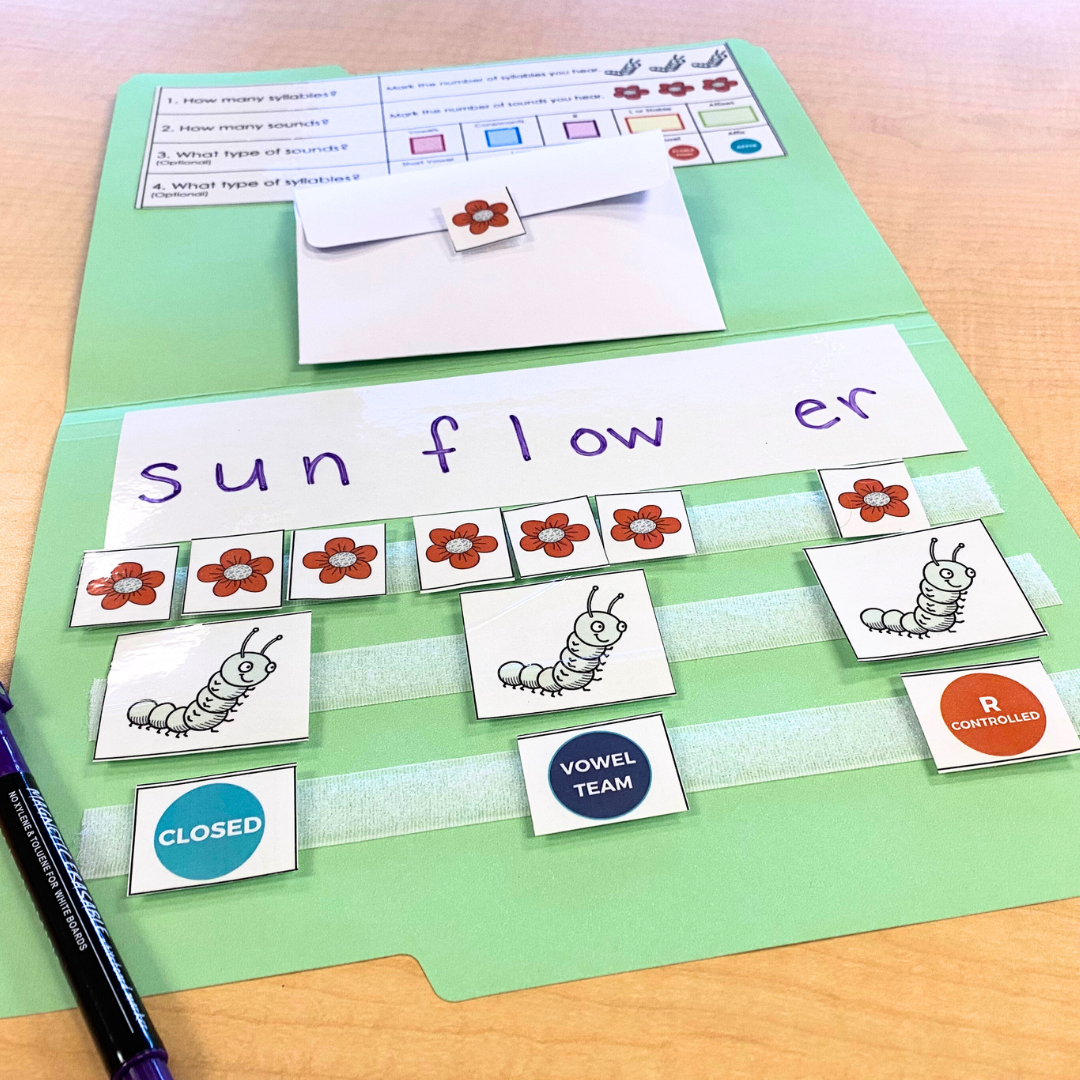
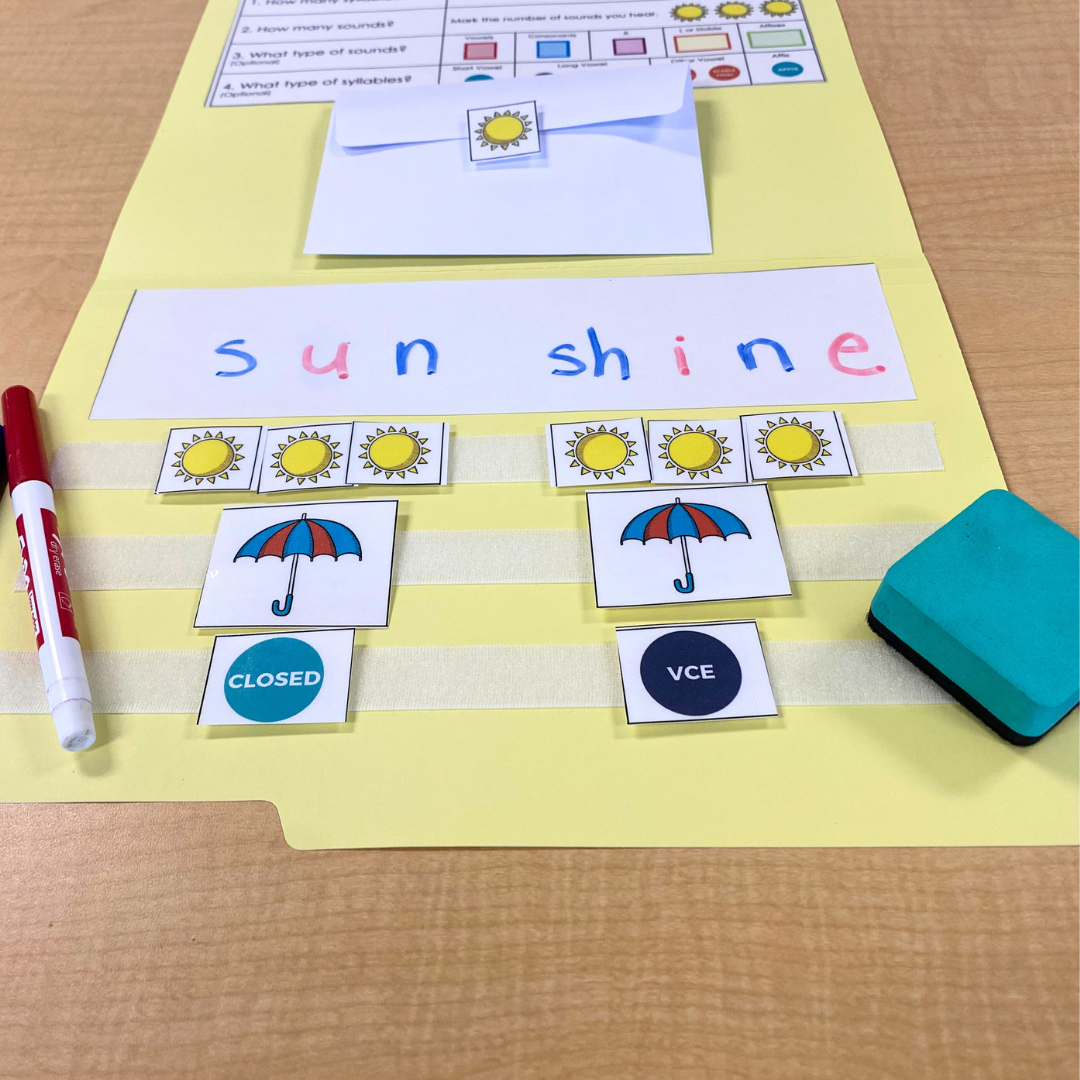
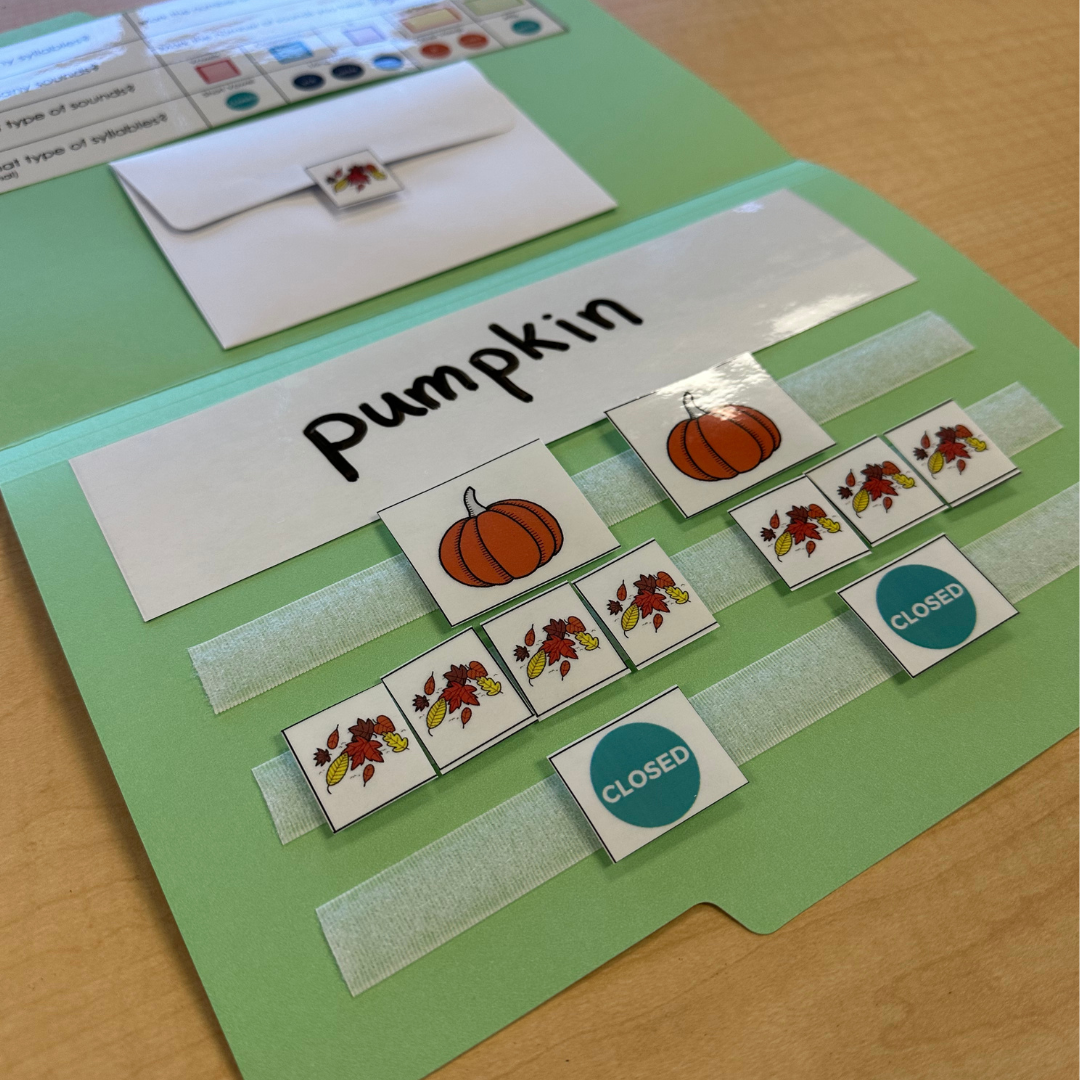
Step 1 - Scoop the syllables
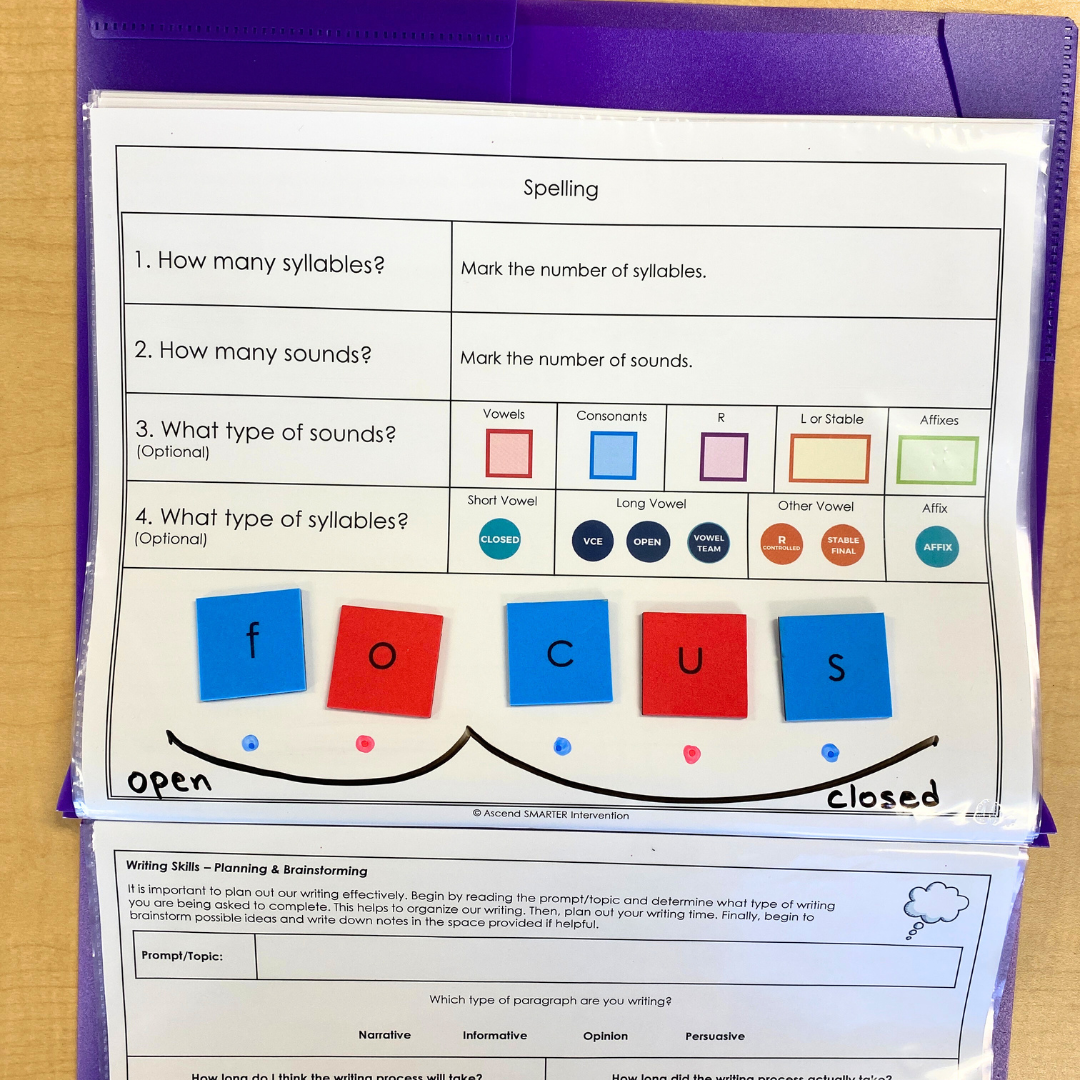
Have the students listen to the word. You can emphasize where the syllables break apart. The students will then count how many syllables are in that word and draw that same number of scoops to “scoop” the syllables. Each scoop will hold a syllable. This relieves a lot of anxiety for our students because it signals that they don’t have to tackle one, huge word. All they have to do is tap or sound out one small piece of the word at a time.
Step 2 - Mark the sounds
Next, students can mark the number of sounds they hear with a dot. Students can focus on marking the sounds one syllable at a time. For example, if they were spelling the word “basketball” they could start by marking the number of sounds in the first syllable /bas/ first, then move to the second syllable /ket/, and then finally the last syllable /ball/). Now, it’s important to recognize that the number of sounds does not always equal the number of letters! This is part of the reason spelling is so tricky! For example, “ball” has 4 letters but only 3 sounds. Students need to focus on marking sounds not letters!
Step 3 - Identify the type of sound
This step is optional but can be incredibly helpful. In this step, you want students to identify whether they hear a vowel sound or a consonant sound. The reason that this is important is because every syllable needs at least one vowel sound. We have students color-code their “sound dots” marking consonant sounds in blue and vowel sounds in red. This helps them visually see if each syllable contains a vowel sound.
As they progress in ability it can also be helpful for them to identify if they hear an “R” sound, “L” sound, other stable syllable, or an affix. This is important because these patterns have different “rules” associated, for example, you might hear the sound /r/ and need to determine if it’s a consonant /r/ or vocalic /er/ (same story for /l/).
Step 4 - Identify the type of syllable
Again, this step is optional but can be incredibly helpful because certain syllable types carry specific rules. For example, if you hear a /k/ sound touching a vowel at the end of a closed syllable you would use CK instead of C or K. Now, this of course requires a higher level of knowledge so this step isn’t required but if you are working through a systematic phonics progression, it can help students begin to make connections. It’s also an opportunity to help guide students if you have a word like “plane” and you want to clarify that this is a VCE syllable and not a vowel team syllable like “plain.”
That’s it! Super simple!
You can have students complete this on a whiteboard, in their notebook, or you can use a graphic organizer to help them remember the step-by-step process. Sometimes, for our intervention students, we even like to mix this up by using visuals or manipulatives to keep it fun and we switch them out with the seasons.
To grab all of our favorite spelling resources, check out the 5CCL Activity Library. Click below to learn more!