How to Organize Your Classroom Walls: Getting the Most Value Out of Your Visual Aids
All over Pinterest, Instagram, and TikTok - there are thousands of classrooms and reading intervention rooms that look like they are straight out of a magazine. Beautiful, perfectly curated decorations line the walls and create a stunning aesthetic - one that Clea and Joanna from the Home Edit would drool over.
It’s easy to scroll through these pictures/videos and feel like your room needs to look like the inside of the Container Store. While there is something to be said about being in an organized space that brings you joy, our end goal is tying beauty with functionality.
Today, we want to talk about how to optimize your wall space to support your students’ literacy development.
How to Make the Most Out of the Anchor Charts in Your Classroom
First things first - what is an anchor chart?
Simply put, an anchor chart is a visual aid. They are a resource that students can look at to help “anchor” their knowledge.
Now, the idea of having anchor charts in classrooms isn’t new. They’ve been around for years! However, there is a system that you can use to optimize your use of anchor charts.
Step 1: Explicitly Teach Students How to Use the Anchor Chart
It’s easy to hang something up and reference it during instruction. However, without explicit knowledge of how to use the anchor chart, students may struggle to use them.
Let’s walk through what this looks like together.
We have these double-sided vocabulary anchor charts hanging up in our office. When we introduce them to students, we walk through exactly what a category, function, synonym, and antonym is so they know what the charts are referencing. We like to use magnets to anchor the charts (no pun intended) to the wall so that we can easily flip them over and show students the explanation side if needed. You can also use these clothes-pin push pins if you have a corkboard instead of a magnetized one.
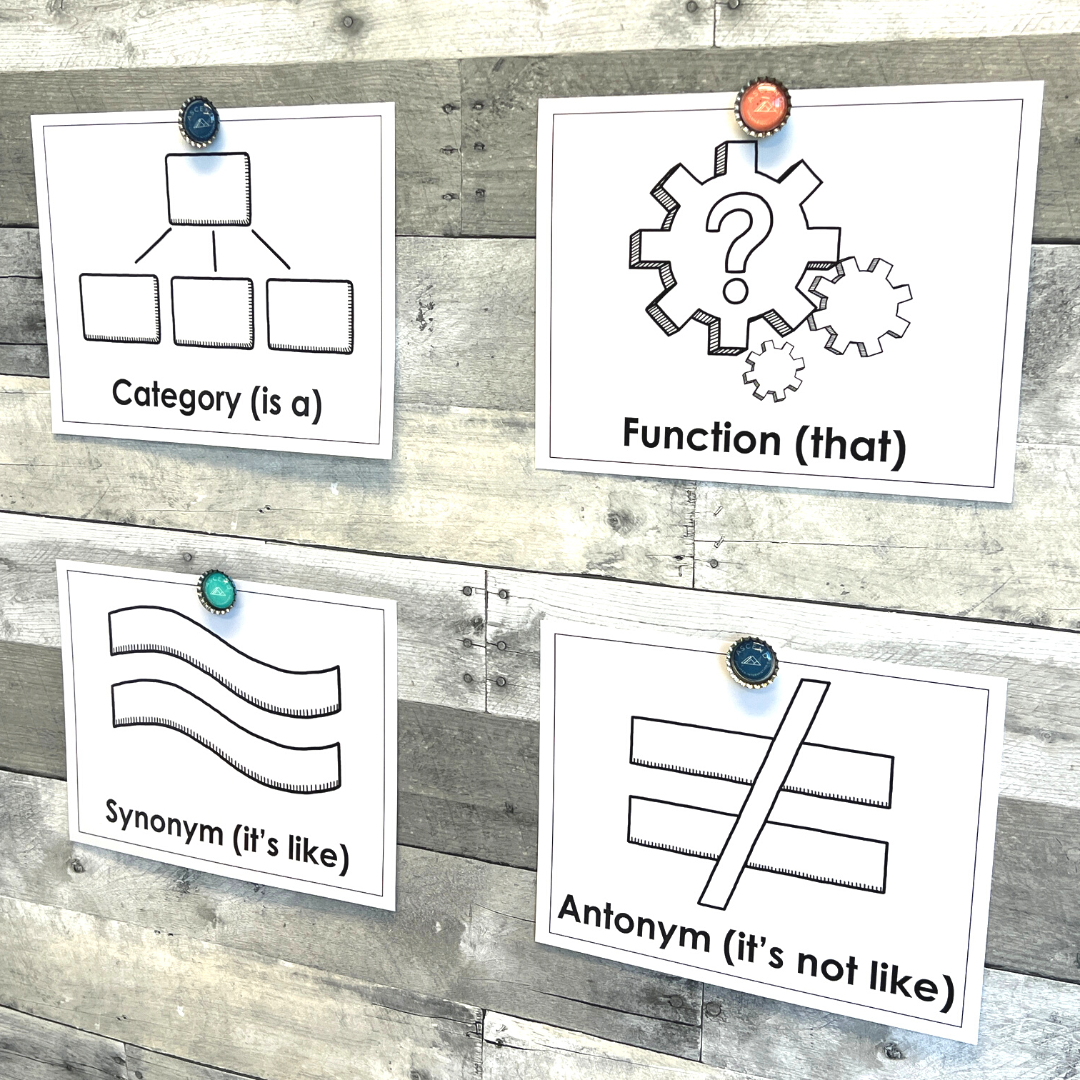

Then, when students are working on their vocabulary words, they can use these four visuals as a guide. They know they need a category, function, synonym, and antonym to have a full definition. The images on each of the cards help students remember what they’re looking for (i.e., a category is the name of a group other things can fit into, a function is how something works/what it is used for, etc.).

Step 2: Add more as students learn more
In addition to vocabulary anchor charts, we also like using them for phonics and comprehension.
As students learn more phonics patterns, we use an anchor chart to help them organize the patterns by syllable type. As their knowledge grows, more patterns are added to the anchor chart.
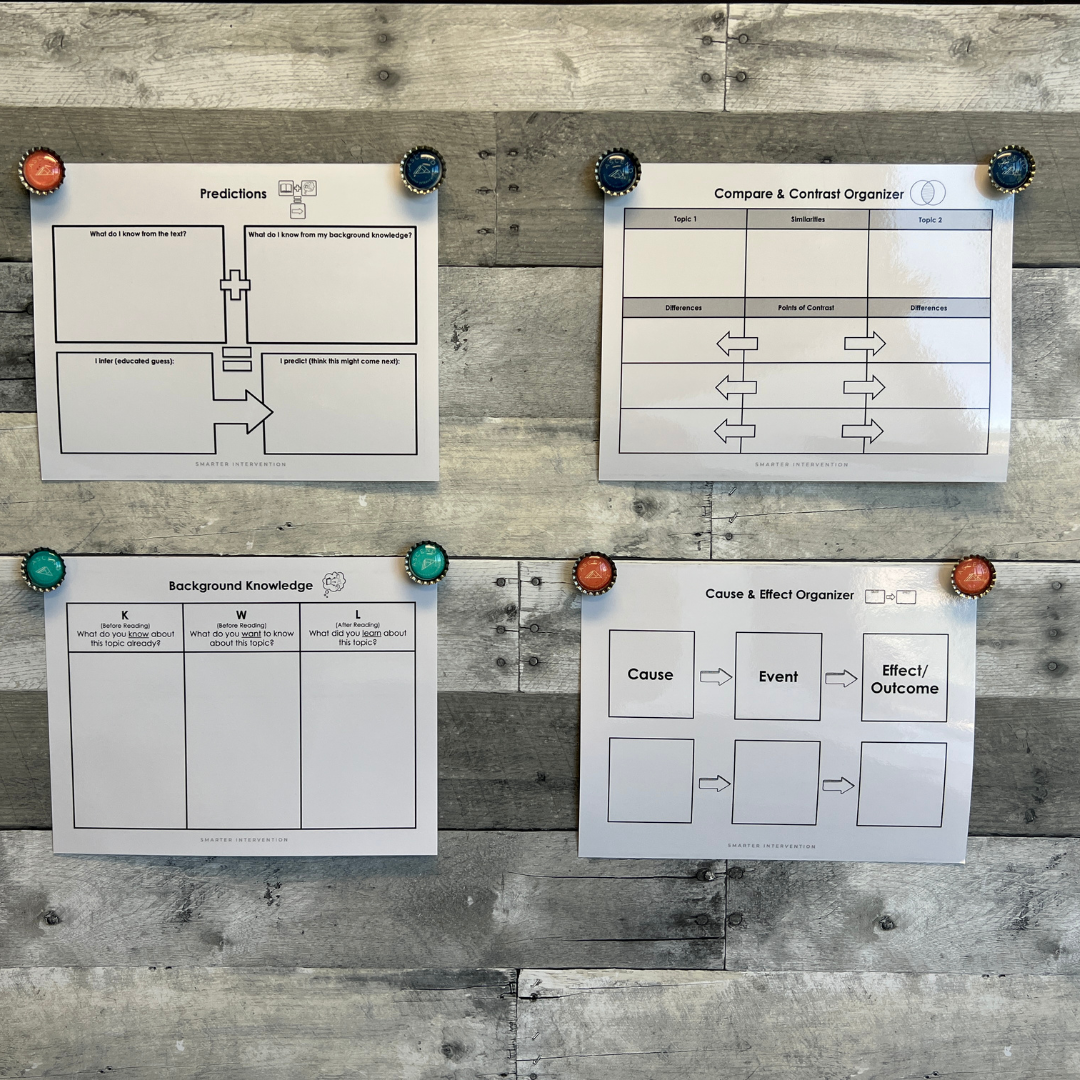
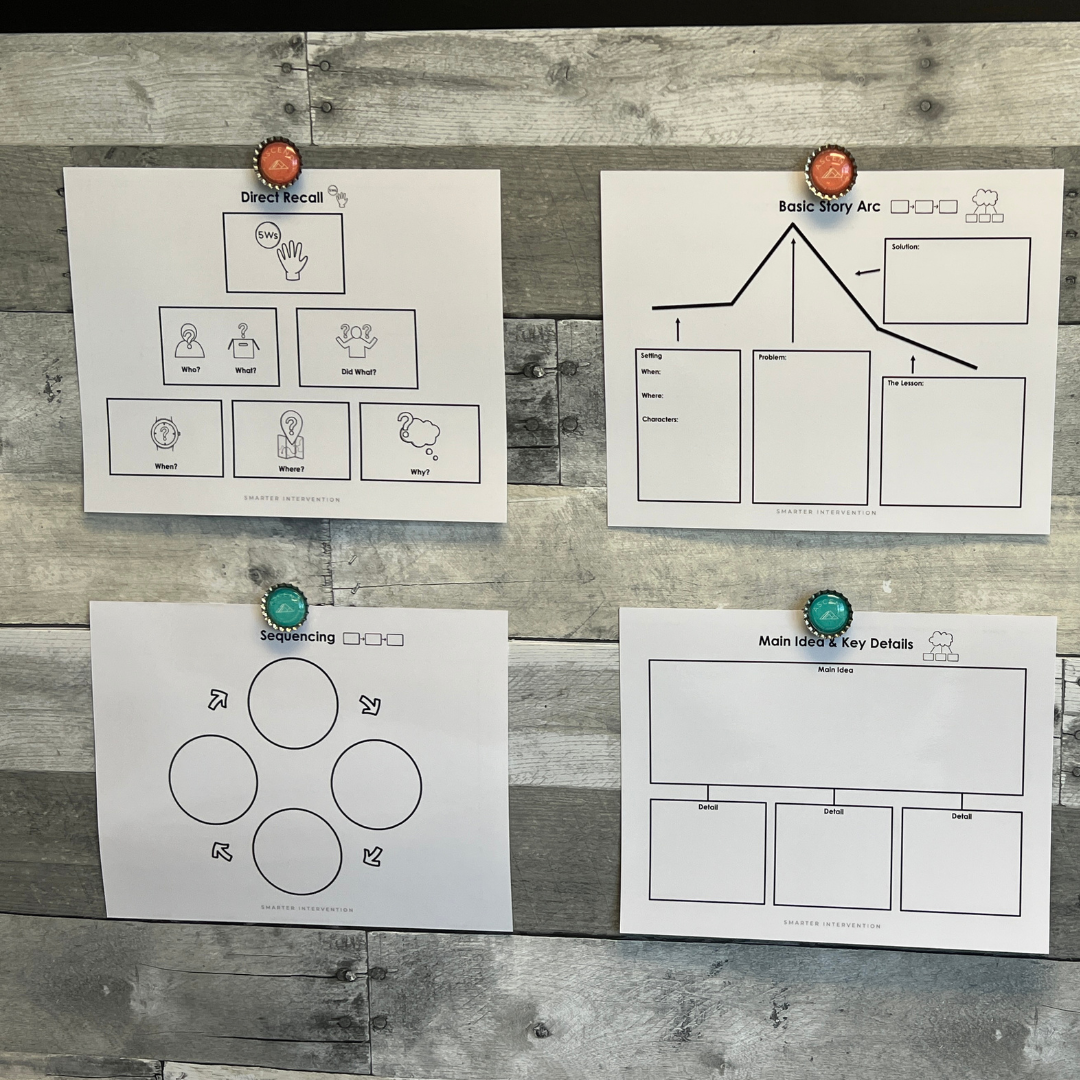
We use a similar process for comprehension. There are so many different kinds of comprehension questions, each requiring a different cognitive process. The way students need to interpret information to answer a direct recall question is different than how they make an inference. You can read more about the graphic organizers we use to support these cognitive processes >>>here.<<<
We’ll hang the graphic organizers on the wall as an anchor for students to reference when answering comprehension questions. We’ll start by hanging up only the graphic organizers we’ve explicitly taught students how to use. Then, as we teach more, we’ll add more organizers to the wall.

Bonus Step: Organize Your Anchor Charts to Further Support Comprehension
For skills like comprehension, there is a hierarchy of skills. At the bottom are cognitive processes that rely solely on students finding information presented in the passage and working up to complex processing that involves students analyzing what they’ve read. We like to place the anchor charts in a way that visually expresses this hierarchy. This helps students recognize how in-depth their answers need to be based on the style of question their answering. You can find more information about this >>>here.<<<

That’s it! An easy way to optimize your visual aids to support learning.
So, while we don’t have any style tips to help with the aesthetic of your room (we’ll leave that up to the TikTokers & Instagram influencers), we hope that you found these tips for how to use your wall space to support learning helpful! We love using functional decor, like the anchor charts shown above, to decorate our office AND support students’ learning processes.
Looking for the vocabulary & comprehension anchor charts pictured above?
Some of the links in this post are affiliate links. While this does not increase the cost for you, we do get a small commission if you choose to purchase these items. We promise that we only share items we use and love!