How to Organize Your Lesson Materials
Who doesn’t love a good organizational overhaul? I mean Home Edit meets Pinterest meets education - yes, please!
We get TONS of questions not just about how we organize our lessons with our students but also about how we organize ALL THE THINGS. The literal things that we need to use to deliver our instruction. Well, friends, we’ve got you covered because today we’re talking all about how we organize the materials we use with our students so we can spend more time actually working with our students, than finding all the materials.
Let’s dive right in shall we?

Step 1: Determine where all these files are going
Are we storing things in a file cabinet? A filing crate? A binder? Keeping them in a computer file?
Any of these solutions work, you just need to determine what you have space for and what’s going to make your life easiest. We use a filing cabinet because we work in intervention/special education which means we work with students across many levels of instruction.
We have one cabinet per level of instruction and that cabinet holds all the materials we need to support each level! We have 8 levels of instruction so we actually have two of these filing cabinets!
Step 2: Determine how you’re separating materials

Depending on your setting it might make sense or organize all your materials by week, lesson (our lessons can often take multiple days to complete), or day (we call days “sessions” in our setting).
We organize all our materials by lesson because sometimes it takes us longer to get through all the activities and we want to have flexibility in case things change in our schedule (which they inevitably do!)
Once you know how you are dividing your materials, you can add file folders or dividers to keep everything separate.
We print out these file folder labels on different colored paper to insert into the file folder tab. This makes it easier to see the lesson you’re looking for with a quick glance, plus it feels SO ORGANIZED!!!
Step 3: grab your scope & sequence

After we have our files ready to go, we grab our scope and sequence to get our materials organized. If you want to check out our scope and sequence, you can check it out here but if you’re looking to use this system with a different order of instruction any scope and sequence you have is perfect!
Your scope and sequence is important because this is how you’re dividing up each of the file folders or tabs. In our filing cabinet, we have 16 lesson folders because there are 16 lessons in our Foundations level scope and sequence. If you have more lessons, you will want to make sure you have more file folders or tabs. Alternatively, if you want to organize by week, you will have the number of weeks in your academic year!
Step 4: Collect your lesson resources
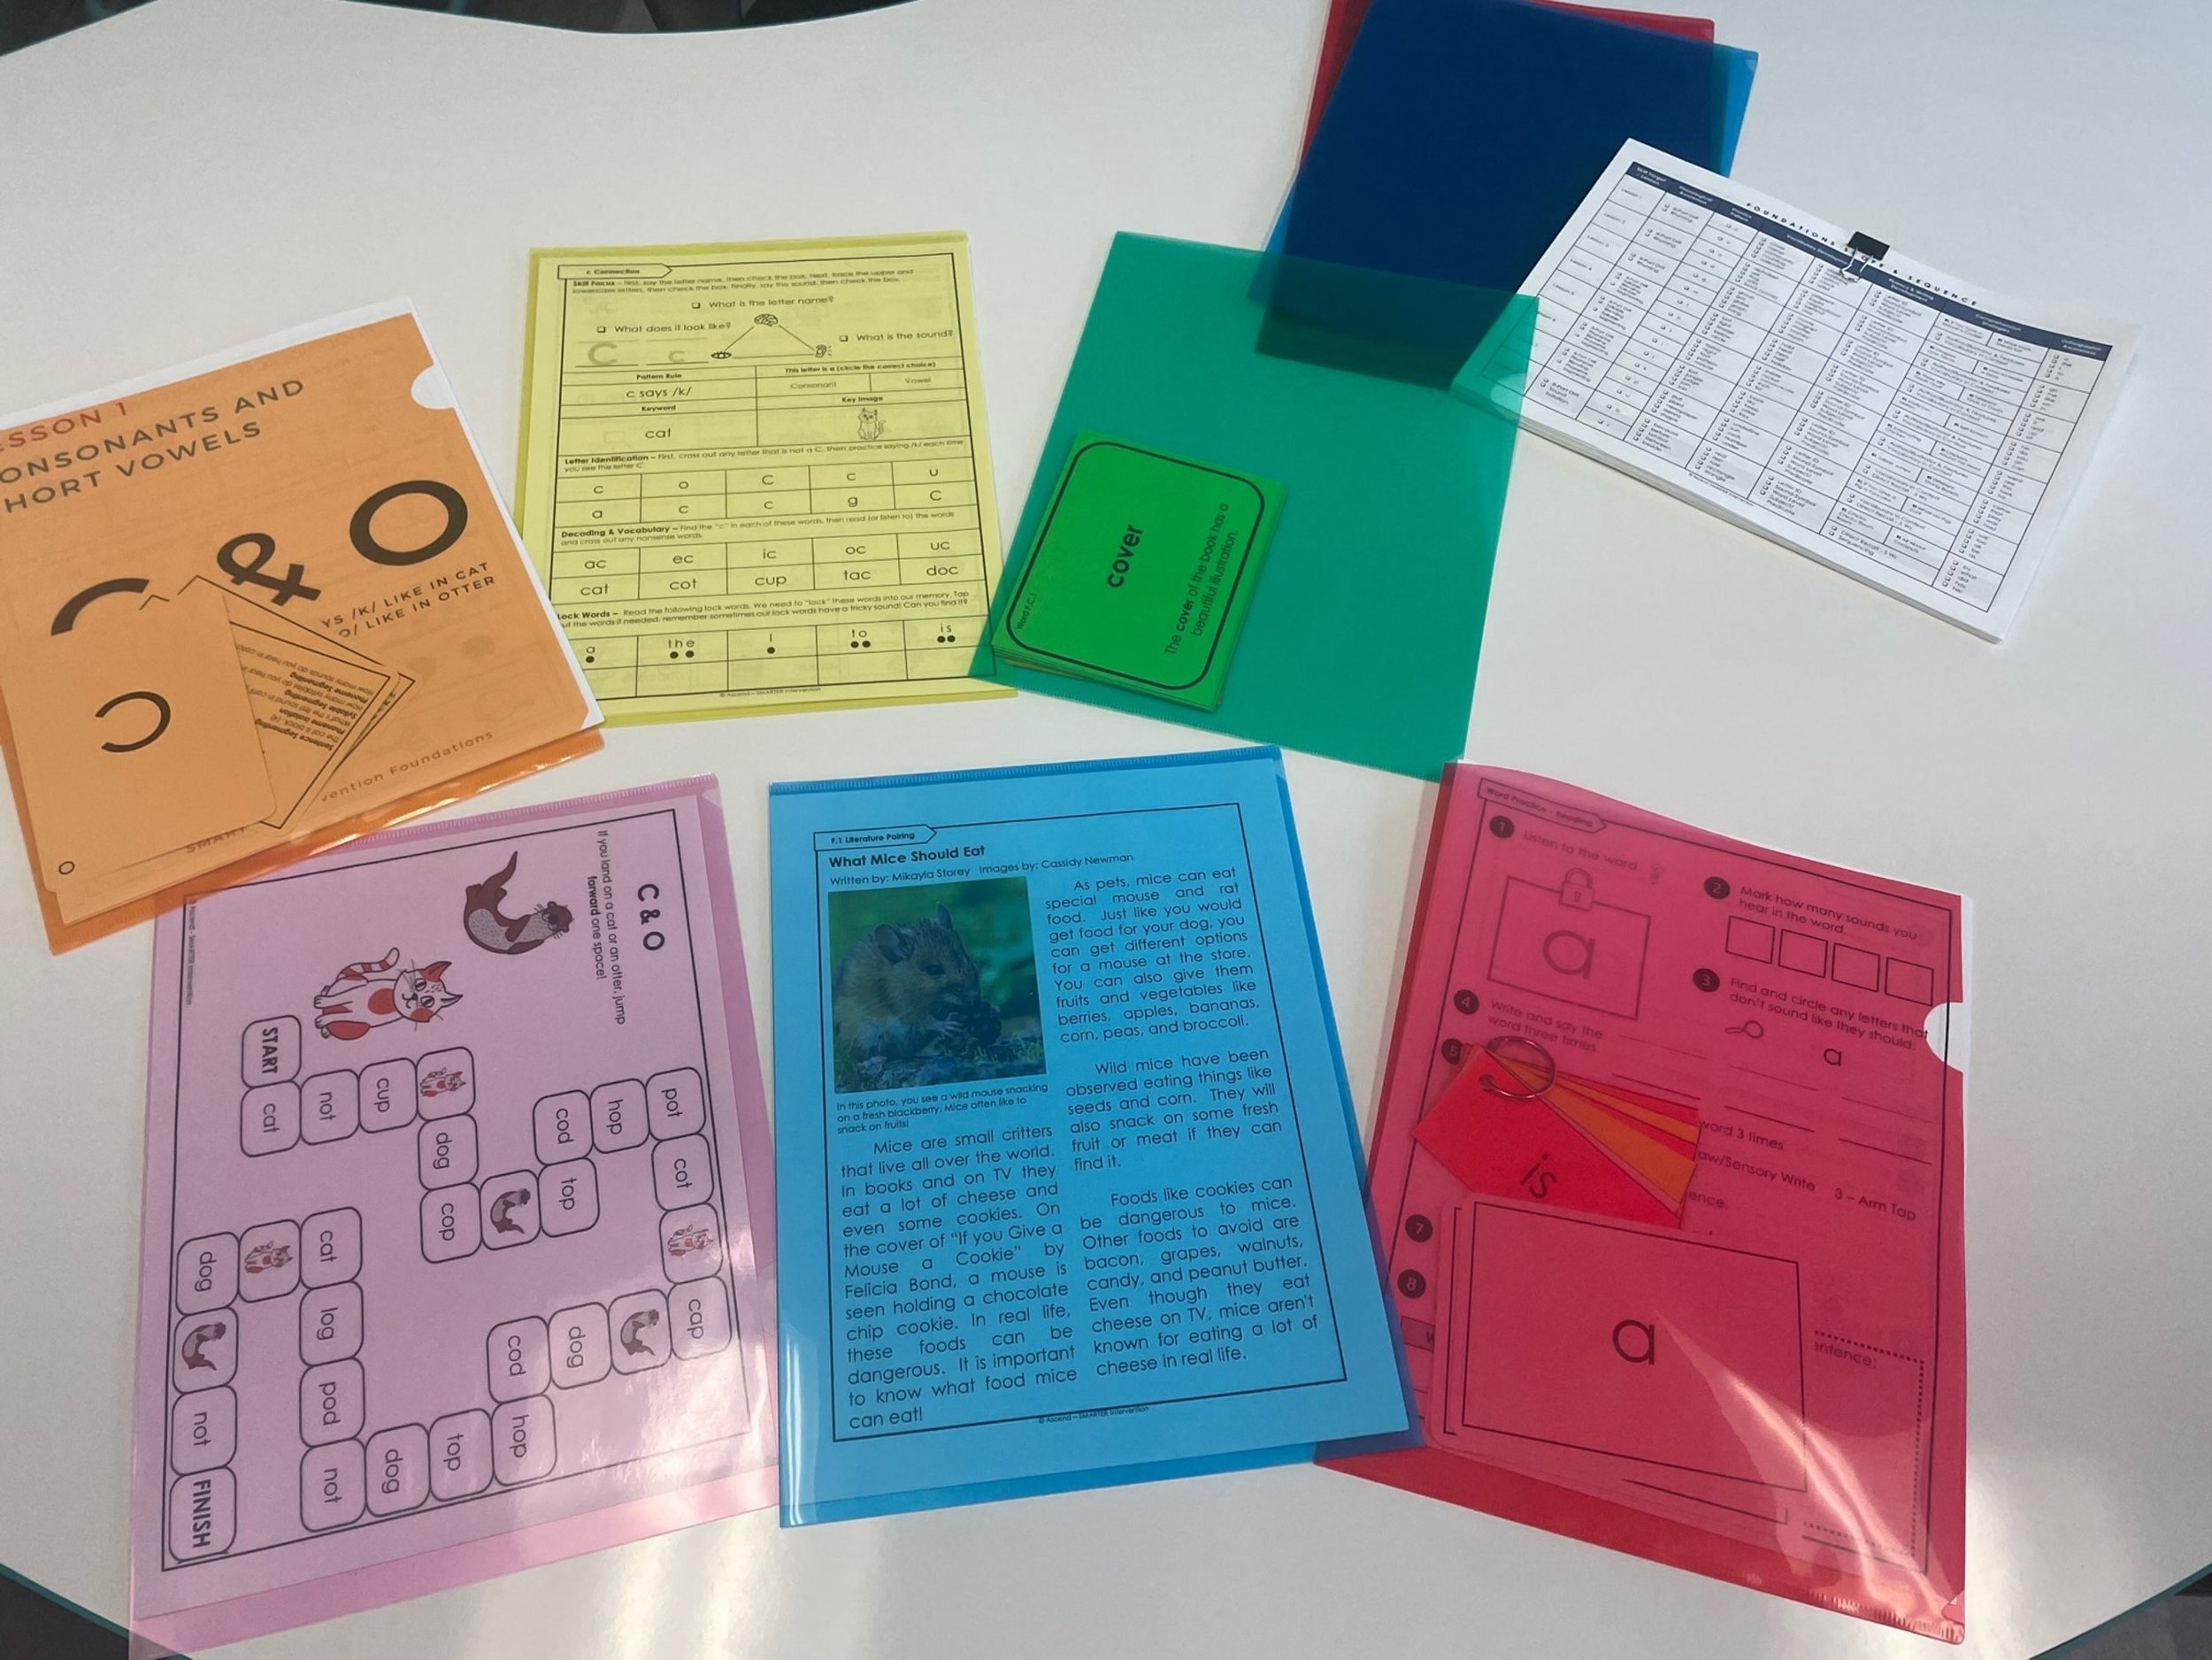
Within our scope and sequence, we have different activities for our core lesson, home practice activities, vocabulary, fluency development, comprehension, and additional activities such as sight word building.
We broke up each of these activities in order to create 6 subsections. You absolutely don’t need to break your lessons into subsections but we find this so much easier to quickly find what we’re looking for.
We color code each section to make it even easier to grab the part of the lesson we need. So, for example, we put the core lesson in orange, the home connections (homework activities) in yellow, vocabulary work in green, fluency work in purple, comprehension activities in blue, and sight word work in red.
How amazing does this start to feel?!

Step 5: Put it together & Admire your work

Add all your files to your filing cabinet, file crate, or binder. You may need to use more than one shelf, cabinet, crate, or binder depending on how many activities you have. If this is the case, you can break it up by quarter, semester, or even by month if you need!
Hopefully, this helps you feel more organized so you can focus on your students and not worry about finding your resources!
If you’re still looking for a system to teach literacy in a way that aligns with the Science of Reading, check out our free Science of Reading blueprint here to help get a structure in place for your lessons!