How to Build Fluency & Comprehension at the Passage Level
When working with students, our end goal is always that they can functionally read and write. A big part of this is the ability to read at the passage level and derive meaning from the text.
Luckily - building fluency and comprehension at the passage level doesn’t have to be hard.
How to build fluency & comprehension at the passage level -
According to the Reading Comprehension Blueprint: Helping Students Make Meaning from Text written by Nancy Lewis Hennessy, the comprehension process can be broken down into three levels of understanding.
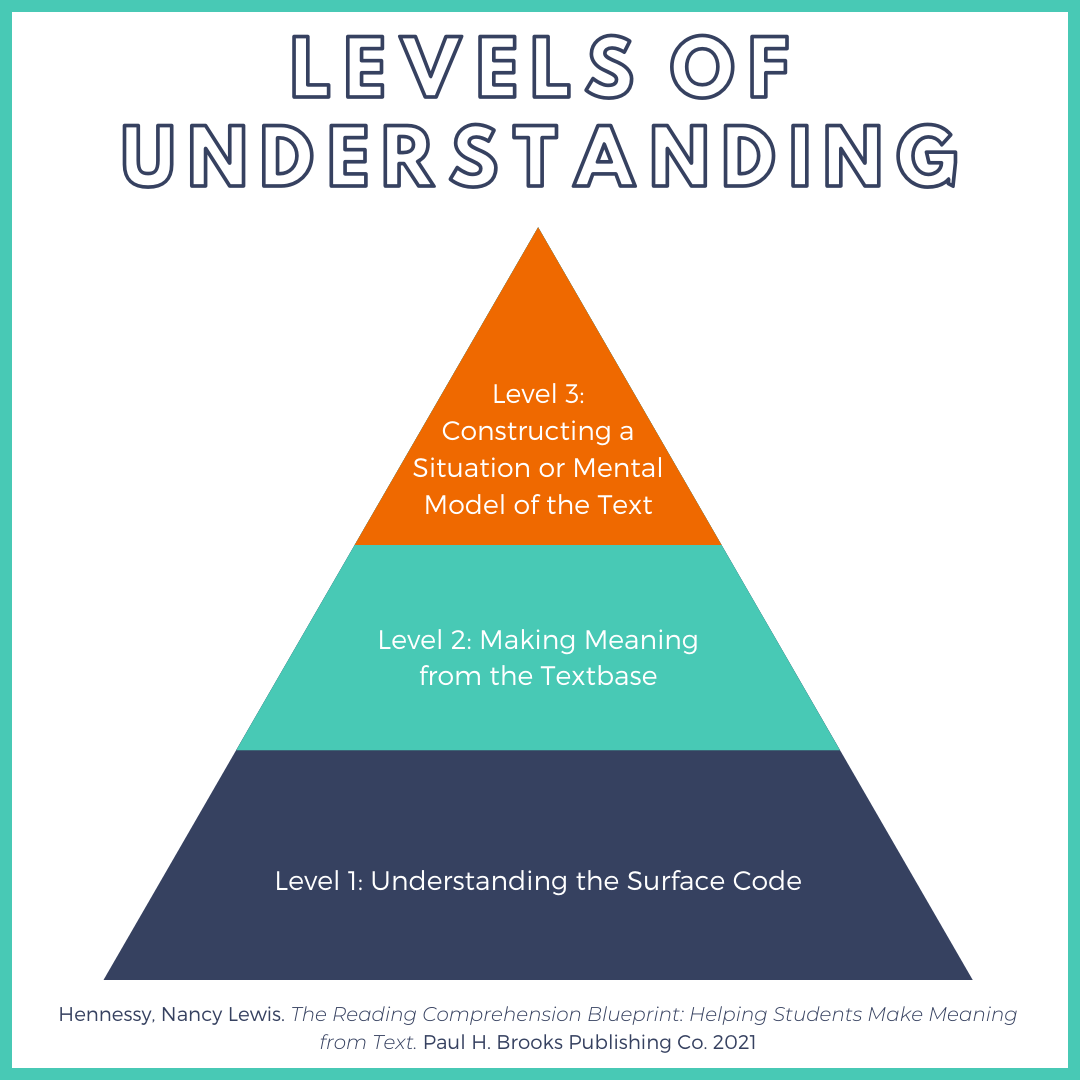
Level 1: understanding the “surface code”
According to Hennessy, the surface code is “represented by the exact words and syntax of the text used by the author…Readers use their understanding of the word meaning and sentence construction to begin building the meaning of the text.”
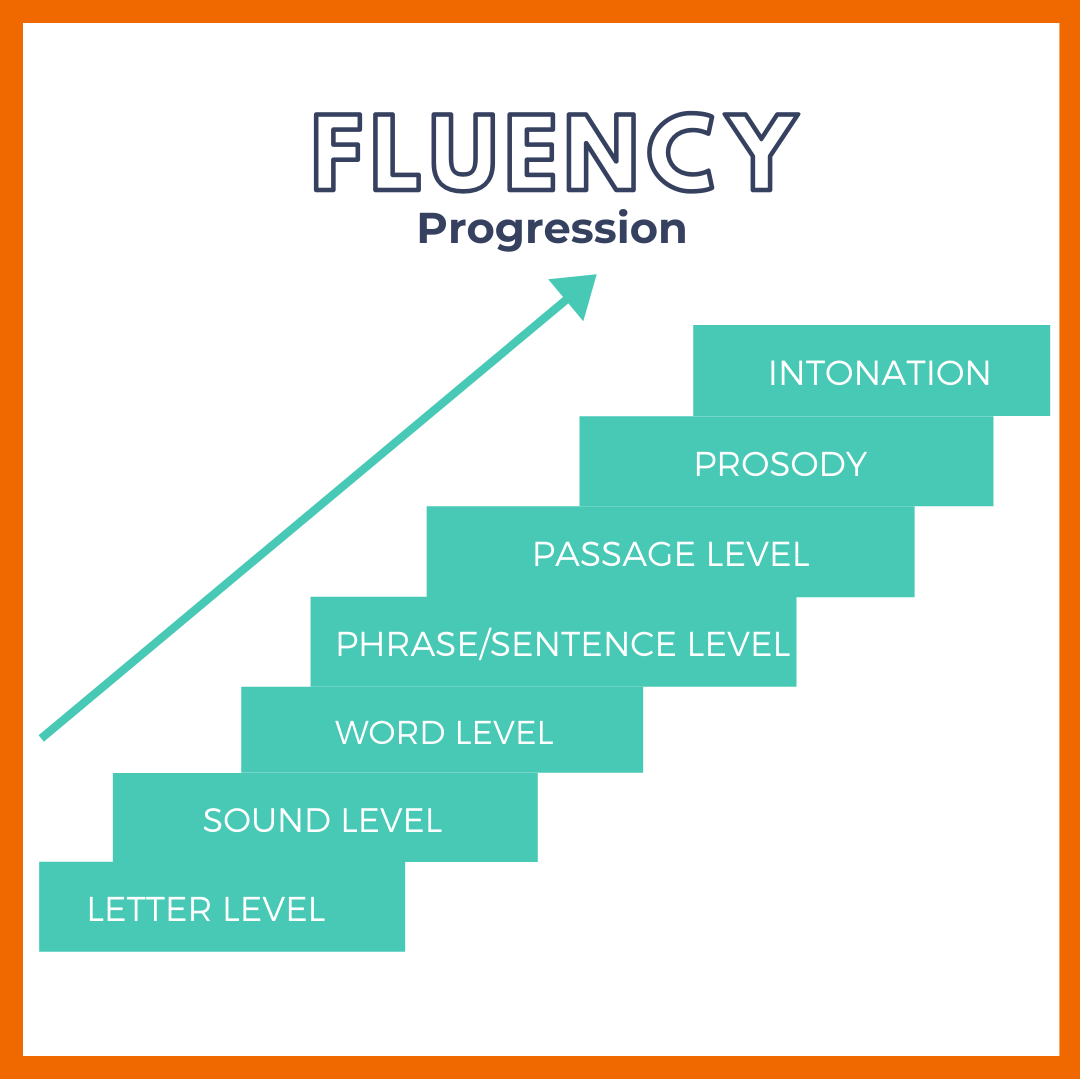
This relies heavily on being able to decode the text appropriately. However, it is more than just being able to decode the text, it also requires reading with proper intonation and recognizing how the words fit together to form sentences and paragraphs with deeper meaning.
Level 2: Making Meaning from the Textbase
Hennessy notes that making meaning from the text is more than just recalling what was on the page. To truly comprehend what we read, we must be able to infer the author’s intended meaning. It means we need to have vocabulary awareness and the ability to understand why the author selected specific words to connect ideas. We must be able to see how these ideas come together and be able to integrate our own background knowledge into our conceptualization of the material.
Level 3: Constructing a Situation or Mental Model of the Text
This third level of understanding requires that we not only recognize information that was stated explicitly but also implied. The mental model we build to interpret the meaning of the text gets stored in our memory and the hope is that we can access it and apply this knowledge later on.
So…how do we help develop the three levels of comprehension in our lessons?
We need students to have the ability to actually read the text.
Step 1: Target the decoding side of fluency
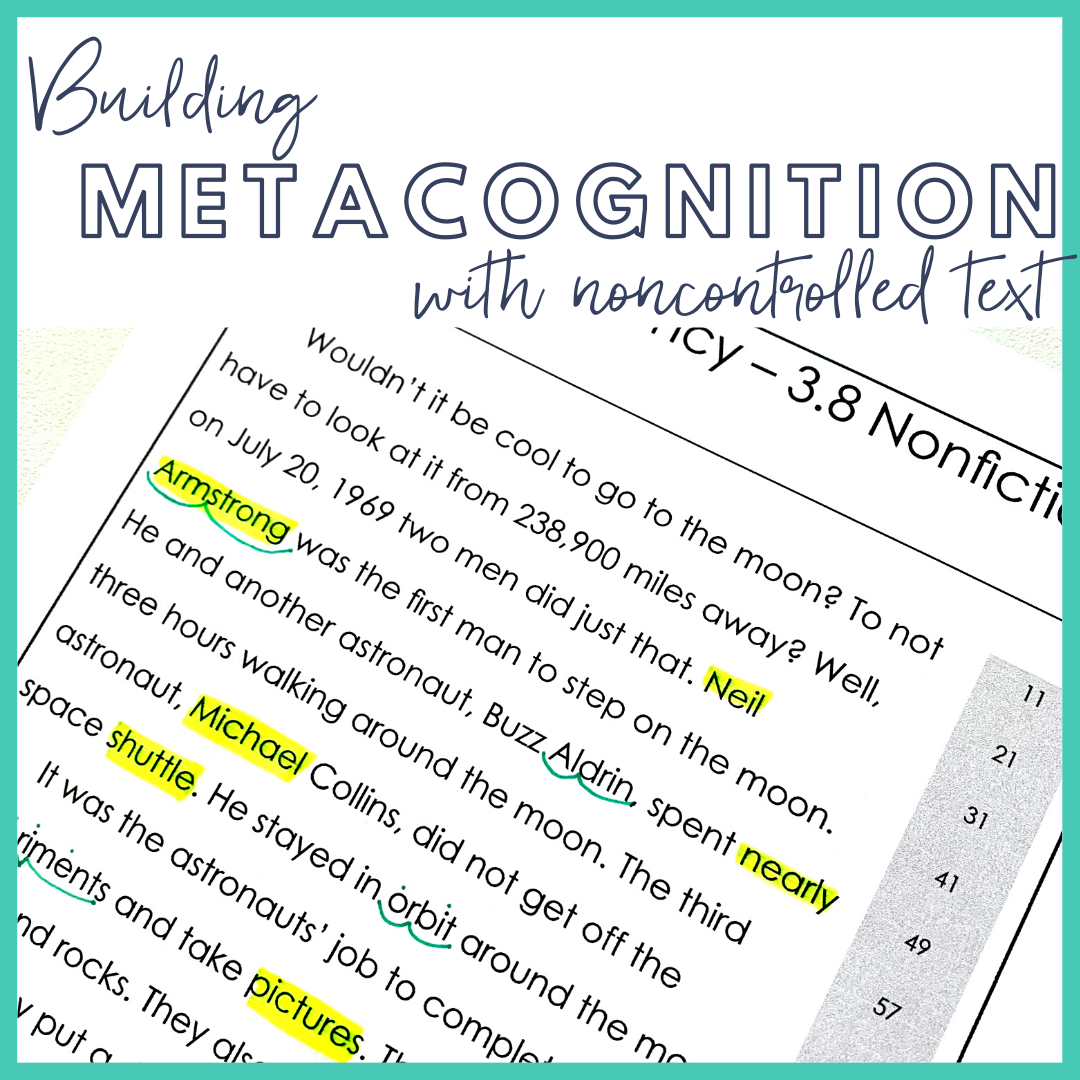
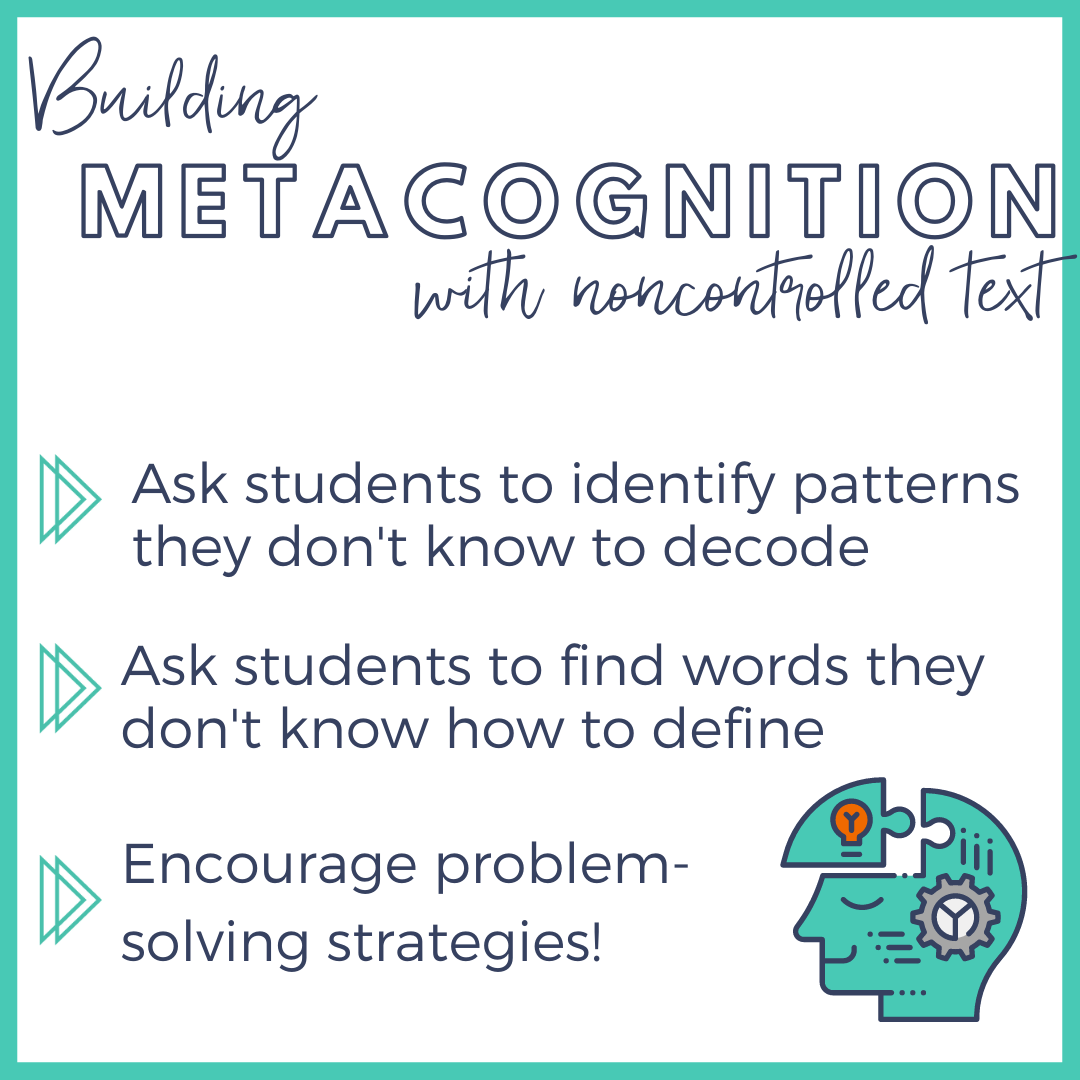
Students should read the passage silently and identify any words they don’t know. Then, you will work through these words together.
If students have been explicitly taught the patterns, you will work with them providing strategies to decode the word(s).
If the word has patterns students have not been explicitly taught, you can simply provide those words for them.
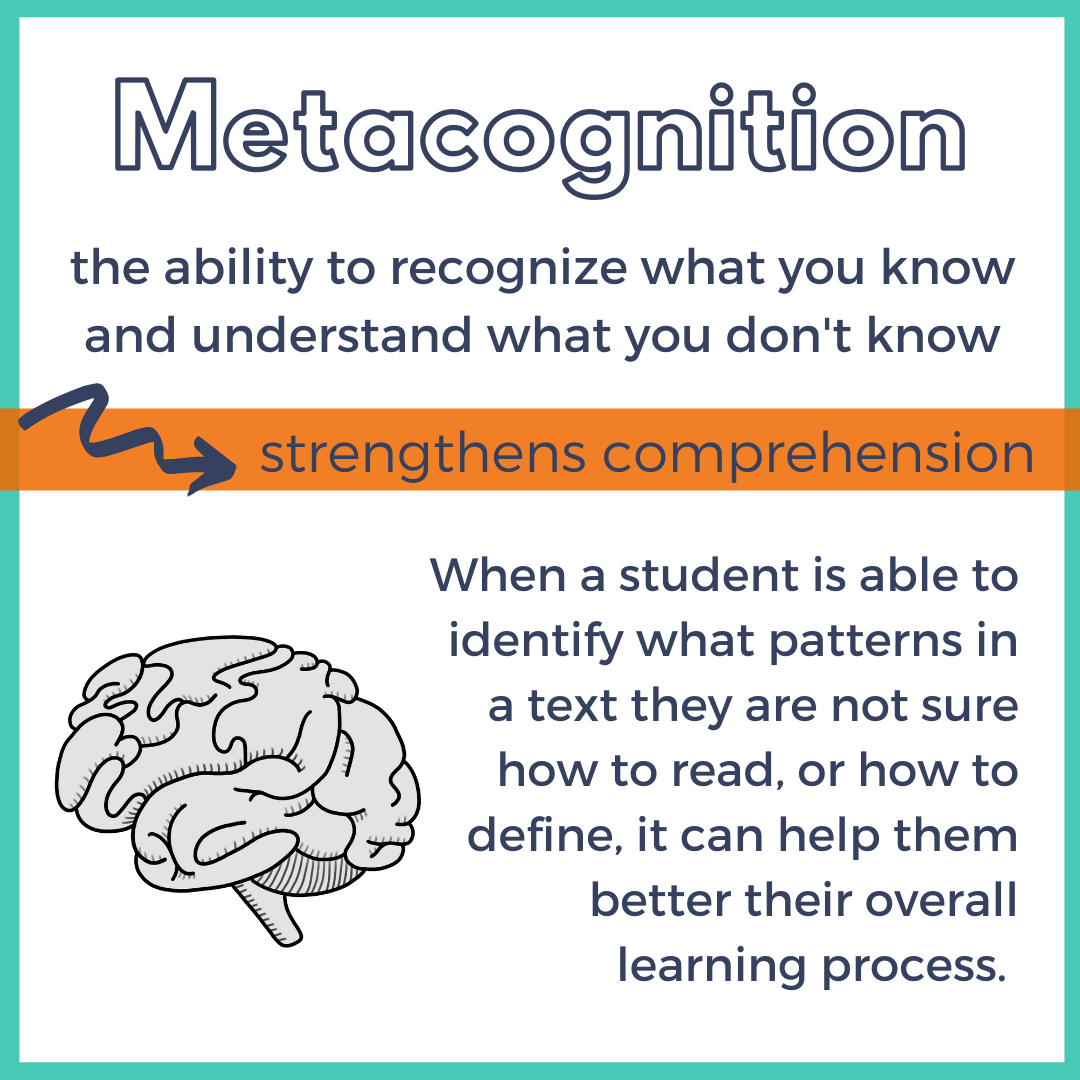
This is a great way to target metacognition and help students learn to recognize and identify what they do and don’t know.
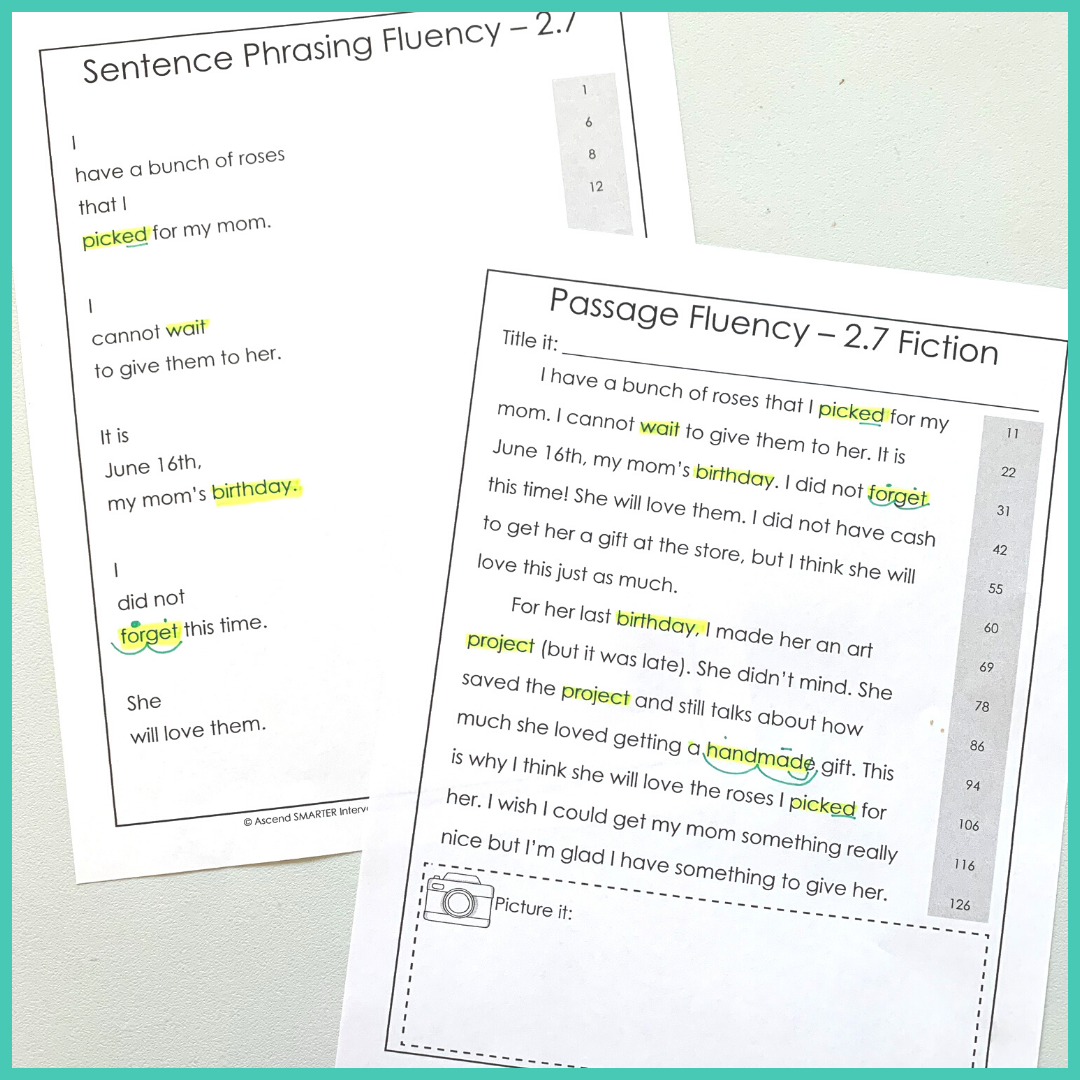
Step 2: Target Fluency with Sentence Phrasing
Ask students to go through and identify the subject, predicate, and adverbial in each sentence. We call this the “who/what,” “did what,” and “where, when, why, how.” You can read more about this in one of our previous blogs, here.
For students who need a bit of extra support here, you can also break it up for them.
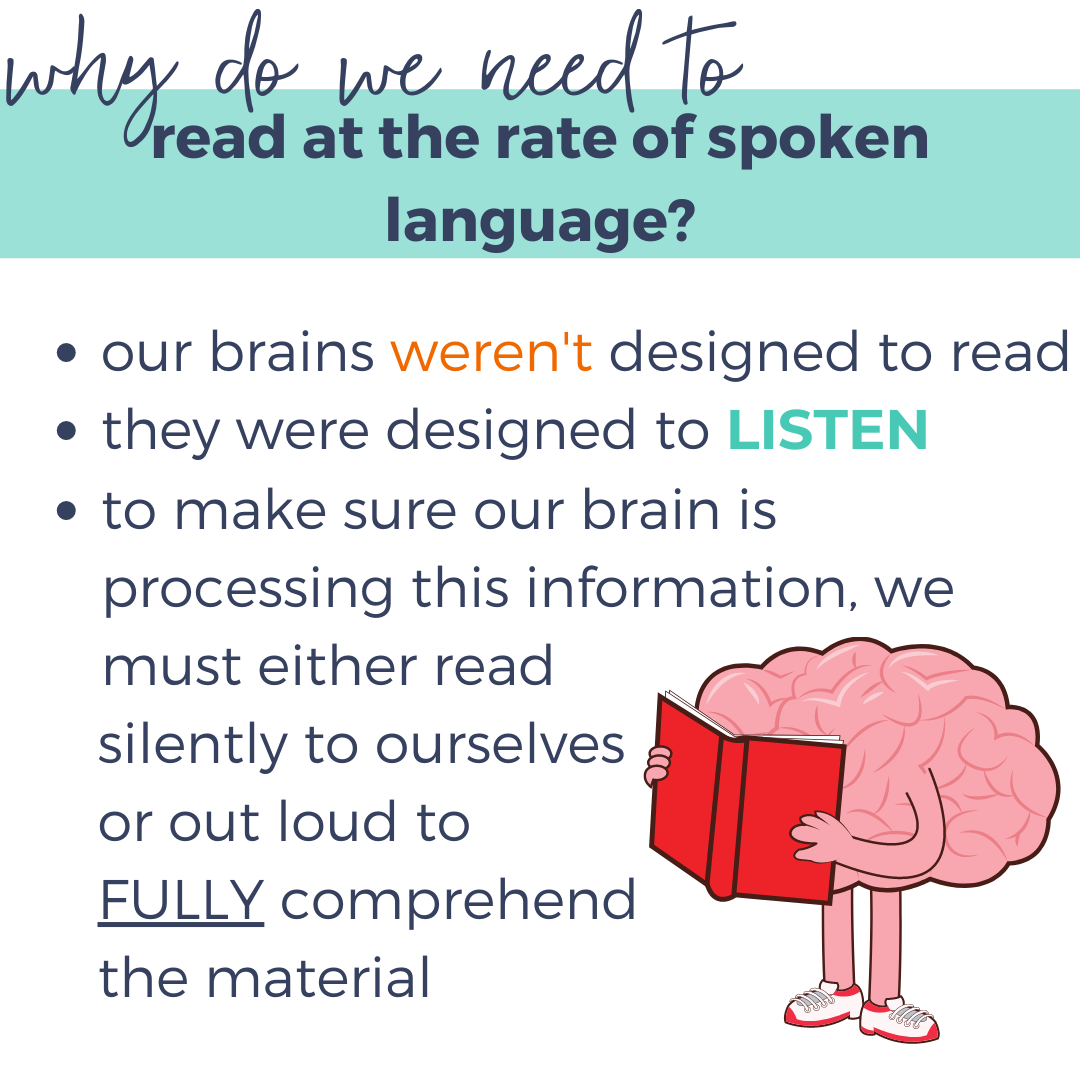
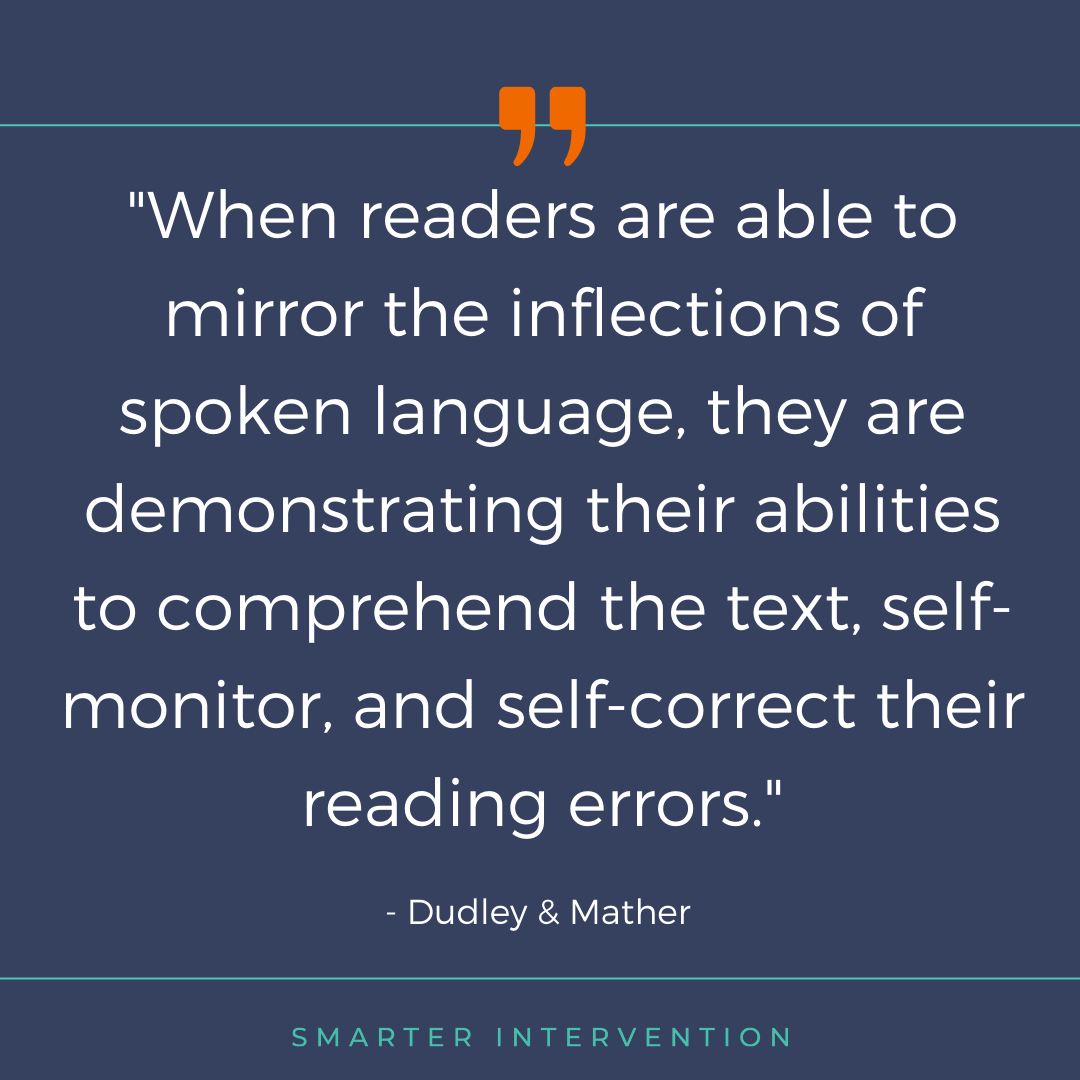
As humans, our brains were not designed to read. They were designed to listen. This is why reading fluency (and by fluency, we mean reading in a way that sounds like spoken language - not just reading quickly and accurately) is critical when supporting comprehension. Our voice (whether we are reading out loud, or the voice we hear in our mind when reading silently), needs to follow a cadence of spoken language so that we can derive meaning from the text.
We want to make sure we are providing opportunities for students to develop fluency accessing texts that sound like spoken language (which means we can’t fully rely on highly-controlled decodable texts all the time - more on this next week!)
Step 3: Read Aloud
We complete a “cold” and a “hot” read (meaning an unpracticed and a practiced read) with students for each passage. The cold read occurs when students read the text for the first time. The hot read occurs after students have had opportunities for “repeated reading” which provides opportunities to develop intonation and prosody without getting stuck in the decoding and sentence phrasing work. They love seeing the numbers jump between their cold & hot reads and it encourages them to practice reading out loud. We use this to track data to see if their fluency scores are rising from week to week on their unpracticed passages.
Each of the first three steps supports level 1 of Hennssey’s Levels of Comprehension.

Step 4: Support Comprehension
There are a number of ways we support comprehension.
Have students identify the 5 W’s (who, what, when, where, why). By discussing these details, we are helping students conceptualize the important pieces of the passage and are laying the groundwork for when they are older and asked to annotate higher-level texts.
Identify unfamiliar vocabulary - similar to how we ask students to identify words they cannot decode in the passage, we will also have them look for terms they don’t understand. This allows us to define them together (and teach students how to look up and make sense of definitions for words they don’t know).
Explicitly teach the different styles of comprehension questions and use graphic organizers with students. This supports level 2 of Hennessy’s Levels of Comprehension. For each passage, we will ask students about the main idea, direct recall questions, to make inferences/predictions, etc. Over time, as students gain comprehension abilities, they should be able to select the appropriate graphic organizer for each question and begin filling them out. The graphic organizers should become mental maps where students can eventually follow the thought process each graphic organizer is meant to support.
You can read all about these skills and how to explicitly teach them, here.
Step 5: Building Connections
In order to support level 3 of Hennessy’s Levels of Comprehension, it is important that students are able to make meaningful connections to the text. This could be in the form of background knowledge, connections to their own lives, to other things they have read, or to topics discussed in class.
With our youngest students, we support this with passages that build on each other. One week, they may read about “Chad the Chipmunk” when working on ‘ch’ and the next week about how he went to help his friend “Shannon the Sheep” when working on ‘sh.’ With passages that build on each other, we can begin supporting students’ understanding of how things they learn fit together.

As students get older and we continue on to more advanced texts, we can ask them to build connections to their lives or things from class. If they read a passage about a child who fell off their bike, got hurt, but eventually got up and kept riding, we can ask them to connect that to a time they overcame a challenge. If they read about how different treaties and pacts that came from WWI contributed to the start of WWII, they can use that background knowledge to understand a cause & effect relationship.
Regardless of age & ability level, we can foster fluency and comprehension skills that help students close the gap and reach our end goal of them finding meaning in what they read, not just being able to decode.
Stay tuned for next week’s blog, where we will dive into decodable vs. noncontrolled text and how we can use each to best support our students.
In the meantime, if you want to start applying these and other SOR-aligned strategies in your instruction, jump over to the 5CCL Activity Library. There we have hundreds of activities that target all 5 core complements of literacy (+ writing) that you can use to target areas of specific need with students of all ages and abilities.